How To Lighten Dark Hair At Home
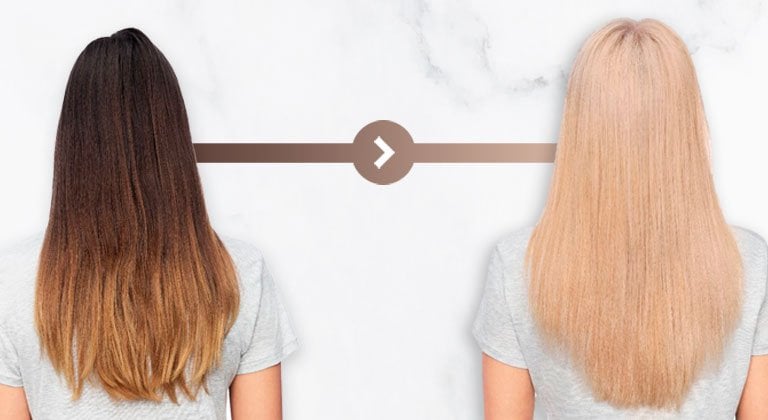
We’ve all done it. We’ve all sat there, watching some lucky someone’s beautiful blonde locks dancing playfully in the sunlight and thought, could I have that? Could I learn how to bleach black hair at home and get that gorgeous blonde look?
Interested in knowing what your favourite blonde shade will look like on you? Don’t forget to use our Virtual Try-On feature to see what shade best suits you. Find out more on our Virtual Try-On homepage at the end of this article, or by clicking on one of our products with the 'Try It On' icon.
Well, the obvious answer is yes. And, bleached blonde hair, or super-blonde hair as we probably should call it, can look amazing, especially in the sunlight!
So, we’re here to tell you how to lighten your hair at home, perfectly. In fact, super-blonde hair is surprisingly easy to achieve if you use the right home dyeing kit, but before you run off to the pharmacy, consider these invaluable tips for how to lighten dark hair at home.
Tools you’ll need for bleaching black hair
Firstly, let’s think about the tools you’ll need for bleaching black hair at home. If you aren’t using a fully inclusive bleaching kit, there are a couple of items that you should pick up, including:
• Hair bleach kit (goes without saying)
• Plastic gloves
• Glass/plastic bowl (not metal)
• Tinting brush
• Plastic cup/transparent plastic bag that you can fit over your hair
• Balancing shampoo
• Developer
• Toner
That last item on the list is key. Without it, your cool blonde may end up a rather brassy yellow, which is something you’ll want to avoid at all costs!
How to lighten dark hair at home: a step by step guide
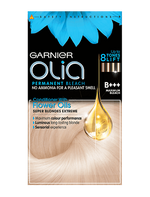
Settled on a colour (perhaps Garnier Nutrisse D+++ Bleach Lightener Permanent Hair Dye) and want to learn how to bleach black hair in a little more detail? Great! After you’ve checked out our instructional video on bleaching black hair, see how to complete the bleaching process with our step by step guide:
- Conduct a patch test 48 hours before using our at home hair dye. For instructions, follow our YouTube guide here.
- Get your ingredients ready – Before you start, make sure you have everything you need close at hand. Towel, bleach, toner, bowl, gloves. Check. You can’t just wing it.
- Divide your hair into sections – You should have two sections at the front and two at the back. Then, secure it with clips. You can skip this step if you have very short hair.
- Mix the bleaching powder – If your mixture is a little too watery, just add more powder.
- Apply the bleaching powder – At this stage, you’ll probably need someone to help you out. Essentially, starting at the back, you’ll need to brush the bleaching powder from the tips of your hair to the roots (being careful not to cover the roots). Be sure to work through this stage quickly, otherwise your colour could end up being uneven.
- Add the bleach to your roots – Starting at the back you’ll have to expose your roots by parting/flipping your hair with the tip of your tinting brush.
- Wait for the bleach to work – Place a plastic bag over your hair and wait for around 40-60 minutes, while checking the colour once every 10 minutes. When bleaching black hair, you’ll see your hair transition from its natural dark colour to orange, before finally turning light yellow. It’s important not to leave the bleach on for longer than 60 minutes, or you could accidentally damage your scalp.
- Rinse – Finally, when your hair reaches the light-yellow stage of the bleaching process, you just need to rinse under lukewarm water.
How to lighten dark hair at home: aftercare tips
Of course, the bleaching process doesn’t end once you’ve finished applying the bleach. If you don’t follow up properly, your hair can end up dry and damaged. One great tip is to go for a trim within a week of bleaching your hair to seal up the ends. You should also be sure to alternate between conditioners and moisture and protein shampoos, while also waiting a couple of weeks before using purple shampoos (to preserve your new blonde tone).
Do’s and don’ts for how to bleach black hair
So, now that you know a little more about how to lighten dark hair at home, we thought it might be extra helpful to take a look at some of our top do’s and don’ts:
Do…
- Know your colour and tone – Whenever you dye your hair at home, it’s absolutely essential to know your existing hair colour, level and tone before you start. That’s especially true when you’re learning how to lighten dark hair. Hair level charts give a general colour name and number and tell you which pigments contribute to your colour, but they do vary by brand, so check the website of the brand you’re intending to use.
- Know your blondes – Once you know what colour and tone you are, you need to decide which colour and tone you wish to change to. Easy? Not really. There are so many different shades of blonde – light, beige, golden, ash, bleach, platinum or even strawberry – and each comes with a different tone. A common mistake when bleaching black hair at home is ending up with orange or even greenish looking hair.
- Look after those locks – Your hair is precious. Be good to it. You really do need to invest in proper hair care after using a bleach at home hair dye kit, such as a deep conditioning treatment that will restore the hair fibres. Otherwise, it will dry out fast and look very sad. Use shampoos and conditioners that are specially formulated for bleached or coloured hair to preserve the colour and help keep your hair nourished. Regular use of deep conditioning treatments will also help to keep your hair nourished, smooth, and soft.
- Give your hair time to recover – Dyeing and constant home hair bleaching damages hair. It’s not a great idea to be a serial dyer. Seriously, hair needs time to recover, so don’t even consider bleaching hair that is already bleached. If you only need to touch up your roots, then only bleach your roots.
Don’t…
- Forget to set a timer – When it comes to bleaching black hair, a rookie mistake is to leave the bleach in till your hair looks blonde. Every dye needs time to develop but bleach is powerful stuff. It could seriously damage your hair and might even burn your scalp. Scalp rot is never a good look. So, follow the recommendations and do that strand test.
- Skip the instructions – Take your time, work out what the steps are and always do a strand test, which will indicate how long you should leave the bleach in. The strand test can also show you if your hair doesn't react well with the bleach. If your hair turns orange, maybe think again unless you want that Lucozade look.
- Bleach without testing – Want to know how to lighten dark hair at home? Why make such a big decision without seeing what the results might look like? With Garnier’s virtual try-on tool, you can pick a brand and either try it on live or upload a photo. So, if you’re interested in Garnier Nutrisse D+++ Bleach Lightener at home Permanent Hair Dye, for example, you can see exactly what it’s going to look like and find the perfect shade for you.
- Leave lines – A very common at-home bleaching mistake is leaving lines caused by other dye or home hair bleaching sessions. Always remember that the ends of your hair, split ends particularly, absorb bleach more readily, so a trim before you go blonde is always a good idea.
Want to watch our YouTube guide on how to bleach hair at home? Click here.
Want to find out a little more about how to care for newly bleached hair? You can check out our article. Think you’re up to speed on bleaching black hair? Great. Take the next step with Garnier Nutrisse D+++ Bleach Lightener Permanent Hair Dye, right here.