1920x336 your first hair colour at home what you need to know 768x420_your-first-hair-colour-at-home-what-you-need-to-know

Performing your first at home hair colour: tips and tricks for how to dye your hair at home

Performing your first at-home hair dye can be daunting but this guide has everything you need to know to achieve your new look at home. We’ve laid out our top tips below, but why not get started with this home hair dye tutorial video?

Do you want to try on your favourite shade before you buy? Before buying that box of at home hair dye, use our Virtual Try-On service to see how your chosen shade looks on you. All products with the Try It On icon are available for you to try on our website. Click on a shade and discover your new favourite hair colour. Find out more.

Perfecting pre-dye care

Before you get started with dyeing hair at home, it’s important to make sure that your hair is in good condition. That means treating your hair gently, using the right styling and shampoo products, and getting a hair treatment at least once a month. Why? Simple. Healthy hair will keep your new colour bright and vibrant for as long as possible, making pre-care a super-important part of the process.

What else can you do during the pre-dye process? Firstly, consider using a hot oil hair treatment around three days before you get started on your DIY home hair dye job. This helps condition your hair strands to take on your new hair colour better. You should also try not to wash your hair the day you get it dyed, as your hair’s natural oils will help you achieve a far more even look. 

What tools do you need to start dyeing hair at home? 

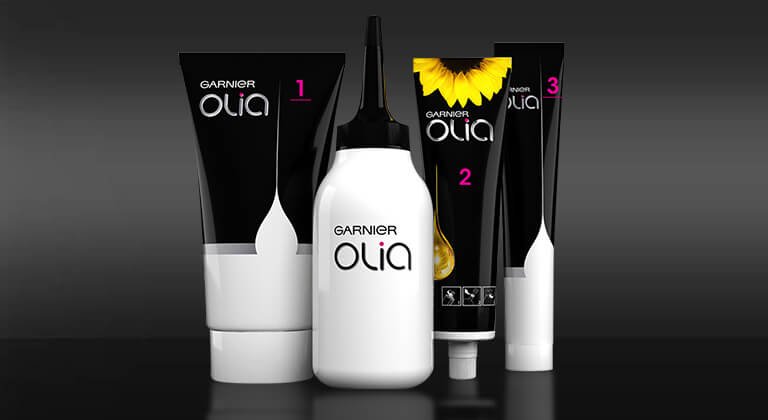
It’s not too difficult to get started with DIY hair dye, as most of the things you’ll need to colour your hair are included in your hair dye kit. If they’re not already included, you should also make sure you’ve got a plastic bowl, plastic gloves, a tinting brush and a towel.

Colouring hair at home doesn’t have to be a nightmare!

Dyeing hair at home for the first time can sound like a tricky task. With this ultimate guide to DIY hair dye, you can be sure that your strands will be left looking salon worthy! So, without further ado, check out our tips for dyeing hair at home

1. Be realistic

When choosing the best at-home hair dye colour for the first time, make sure you choose a shade that will suit your natural skin tone. Black hair dye may not be the best option if you’re fair skinned and blonde. Go for a honey copper colour instead. Hair dye can only lift 1-2 levels. Always check the back of pack to see if this shade is right for you.

2.  Check out our virtual try-on tool

If you’re not sure how a certain hair colour is going to look on you, Garnier have an easy solution. Head on over to our virtual try-on tool to see how different shades of our home hair dye colours are likely to look on you. 

3.  Buy more

More often than not, people can underestimate just how much hair dye they need. If you have long and thick hair, always buy a little extra to make sure you get perfect coverage all over. You don’t want to be left feeling disappointed.

4.  Protect your skin

Getting hair dye on your skin is always a pain as it can take a few days to fade. To avoid this, rub some Vaseline along your hairline and the tips of your ears. To protect your hands and nails, make sure to wear the gloves provided in your hair colour kit.

5.  Do a patch test, 48 hours before

So, how do you do a patch test? All you need to do is apply a tiny bit of the unmixed colourant cream behind your ear, (remove earrings), reseal the colourant cream and wait 48hrs without washing, covering or touching. You can follow the instructions seen in our patch test YouTube video here. If you don’t notice any skin reaction, you’re good to go! 

6.  Practice damage control

All hair dye contains peroxide that can strip the hair of its natural moisture and leave it looking dry and feeling brittle. Be sure to use the conditioner provided in your hair colour kit and remember to use a good conditioning treatment at least once a week.

7.  Don’t wash your hair

Freshly dyed hair shouldn’t be washed for 48 hours. This is enough time for your hair’s natural oils to fully lock in the colour. Just pin back your hair for a few days and wait to unleash your new look.

8.  If it goes wrong, don’t panic

A bad DIY hair dye job can happen to anyone. The most important thing is not to panic and make any rash decisions. To find out exactly what to do if you’ve accidentally gone from a subtle strawberry to a bleach blonde bombshell, check out our Home Hair Colour Problems: Hair Dye Mistakes Solved article. 


How to dye hair at home: do’s and don’ts 

Now that you’ve got a better understanding of dyeing hair at home, we’ve put together a short list of do’s and don’ts that you should pay attention to. 

Do…

1.  Consider your natural hair colour – When you’re trying to decide the best at-home hair dye for you, keep your natural hair colour in mind. Dyes to lighten your hair often contain peroxide, meaning you’ll have to bump up the aftercare. 

2.  Think about your natural skin tone – As well as your natural colour, you should think about your skin tone before settling on a particular at-home hair colour. Copper and gold can be ideal for warmer skin tones, whereas burgundy can often be a better fit for cooler skin tones. 

3.  Remember that colour doesn’t lift colour – You probably won’t be able to lighten hair that’s previously been darkened without using hair bleach. You can go for a darker shade, but not in the other direction. 

Don’t…

1.  Forget to read the instructions – All DIY hair dye kits have slightly different instructions, so before you jump in, it’s always a good idea to scan the instructions to ensure you get the best results.

2.  Leave the dye on for longer than recommended – You may think that you’ll get a more vibrant finish by leaving the dye on for a little bit longer, but it’s important to follow the instructions to the letter. You don’t want to risk damaging your hair by applying the chemicals for longer than instructed.

3.  Skip the allergy patch test – While getting a new hair colour is always exciting, you shouldn’t skip the allergy test. It’s really simple to do. Usually, you’ll just dab a small amount of the dye behind your ear or on your inner elbow. Then, just follow the instructions. 

To find out more about Garnier’s at-home hair colour options, see our home hair dye kits, right here.

IMPORTANT: Actual results may vary based on your hair colour and condition. For more information, please read our Terms page. Like how this shades looks on you? Make sure it works on your hair. Take our 1-minute quiz to be certain.

Pick your next colour in less than one minute

With Color Match you can find the perfect shade for you
in just a few clicks. Launch the quiz and start your diagnosis!

What look are you going for?

First pick exactly the look you want to achieve using our virtual try on technology to see all our shades. Whether
you want a bold new look or to boost your current
colour, there’s a Garnier shade that will suit your needs.

Get your personal recommendation

We’ll give you a selection of shades recommended by
our hair colour experts just for your needs. If the shade
you want needs professional haircolour assistance,
we'll give you an alternative product recommendation
you can try instead.

Tell us about your hair

Tone, shade, any grey hair to cover? To make sure we provide the best hair color match for you, there’s a few things we need to know. Get our expert recommendations.

Try your personalised shades

Use the latest Virtual Try On technology to try your
tailored product selection and see how they look live on you! Pick your favorite shade and buy online.

Hair Colour 101: Top-Tips and How-To Advice


Discover More

3 steps for dying hair